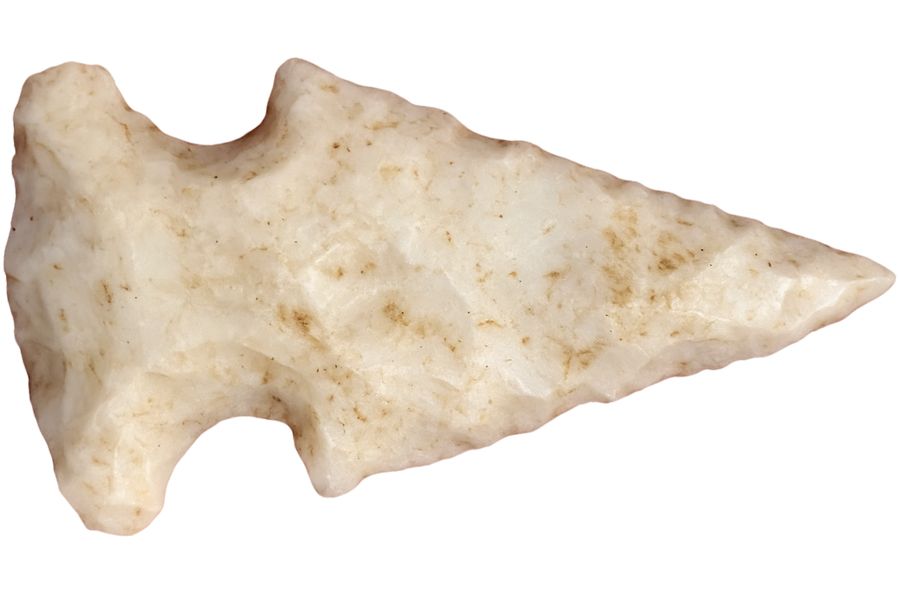
Finding arrowheads in Louisiana is one of the most exciting hobbies you can pick up. Our state’s rich Native American history left behind countless artifacts from tribes like the Caddo, Chitimacha, and Houma people.
Many folks get discouraged when they first start hunting for points because they’re looking in all the wrong places. You need to know where ancient people lived and hunted to have any real success. The good news is that Louisiana’s plowed fields, creek beds, and eroded hillsides often reveal these hidden treasures.
Walking through a freshly plowed field after a good rain might just lead you to your first point. There’s nothing quite like spotting that distinct triangular shape poking out of the soil. Once you find your first arrowhead, you’ll be hooked for life.
The key to successful artifact hunting in our state is understanding local history and landforms. Many of the best spots are right here in central and northern Louisiana where Native Americans gathered near water sources.
Intro
- Some tips and tricks to make your life easier
- The arrowhead shapes you can find
- The stone types commonly used to look out for
- The types of points found in the area
- Specific locations where you should start your search
The Arrowhead and Point Shapes You Can Find
There are several different shapes that were commonly used that you need to keep an eye out for:
Notched
Notched projectile points include side notch, corner notch, and basal notch types. The notches are flaked indentations shaped like a U, V, or semi-circle, made to attach the point securely to a handle or shaft.
The different notching styles were created to suit specific uses and ways of attaching the points.

Side Notch
Side notched arrowheads have small notches carved into the sides near the base of the point. These notches make it easier to attach the arrowhead to a shaft using sinew or cord.
They are widely used because they are durable, easy to make, and allow for a secure fit. The notches are placed on the sides, giving the arrowhead a broad base for hafting.
This design makes them stronger and more stable compared to other types, like corner-notched or basal-notched points.

Corner Notch
Corner notch projectile points have notches that start where the blade meets the base. These notches form barbs that help them attach more securely and work better.
The notch placement is what makes corner notch points different from side notch points. Material is removed from the corners of the base to create a strong and reliable design.
This type of point is simple but works well for attaching to a shaft. The corner notches keep the point stable and firmly in place.

Basal Notch
Basal notch projectile points have notches that start at the base of the point. These notches are shaped to create long barbs that help attach the point to a shaft.
The design removes material from the base to form the notches. This makes the point strong and secure when attached.
This type of point works well because it’s simple and effective. The long barbs give extra support to keep the point firmly in place.
Stemmed
Stemmed projectile points have a sharp tip on one end and a stem on the other for attaching to a shaft. The stems can be contracting, straight, or expanding, depending on their shape.
These points are made from long flakes or blades that are shaped and refined to give them their final form.

Contracting Stem
The stems of contracting stem projectile points gradually narrow from the shoulders toward the end. The taper can range from a small narrowing to a sharp, clear taper.
The tapered stem allows the point to fit securely onto the shaft. This shape keeps the point stable and ready to use.
These points are made to work well while staying simple in design. The tapering stem makes them dependable for different uses.

Straight Stem
Straight stem projectile points have stems with sides that run straight and parallel from the shoulders to the base. This design gives the stem the same shape along its length.
The straight, even sides make it easy to attach the point firmly to a shaft. This shape helps keep the point stable and strong when in use.
These points are simple but work well, with a stem shape made for practical attachment. Their strong design makes them good for many different tasks.

Expanding Stem
Expanding stem projectile points have stems that broaden as they extend downward. This gives them a shape that becomes broader as it goes down.
The wider stem design helps these points fit securely onto a shaft. In some cases, the shape can look similar to side-notched points.
These points are simple and work well, with a stem shape built for stability. The broader base keeps them firmly attached and dependable.
Lanceolate
Lanceolate projectile points are shaped like a lance, with tips that narrow to a sharp point. These points usually don’t have noticeable notches or stems, which makes them different.
The word “lanceolate” describes their long shape that gets thinner at both ends.
Auriculate Points
Auriculate points are projectile points with “ears” or projections that point downward. These ears, called auricles, give the point its special shape.
The downward-pointing auricles help the point attach securely to a shaft. This design is both practical and easy to recognize.
These points are often grouped with lanceolate points because they have similar shapes. The angled auricles make them different and define their type.
Leaf Points
Leaf points, also called ovate or egg-shaped points, are projectile points with a round base. They widen from the tip and then narrow back toward the base, giving them their shape.

The round base makes the design balanced and even. This shape lets the point taper smoothly, making it useful for many tasks.
These points are named because they look like a leaf with a wide middle and narrow ends. The rounded base makes them different from other kinds of projectile points.

Triangle Points
Triangle points are projectile points with blades that spread out from the base to create a triangular shape. They can be equilateral, where all sides are the same length, or isosceles, where two sides are longer.
The triangular shape provides a wide cutting edge while keeping the tip sharp. This design makes the points useful and easy to work with.
These points are simple to recognize because of their geometric shape. The differences between equilateral and isosceles types give this group some variety.
Bifurcated
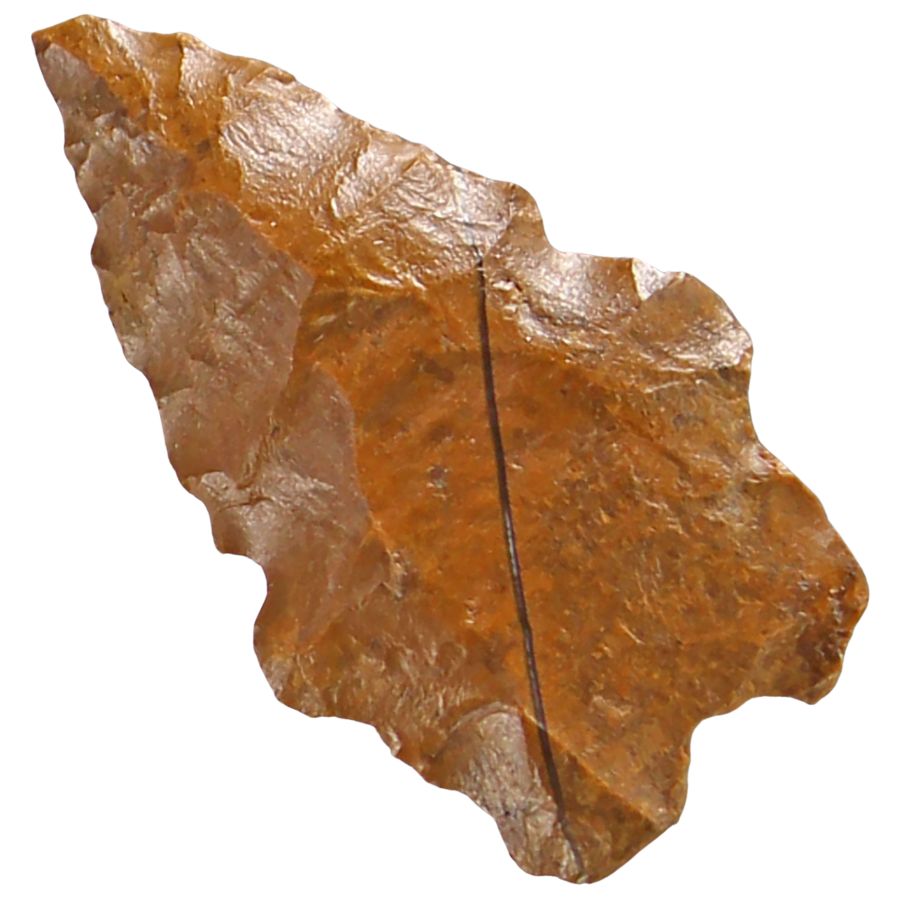
Bifurcated projectile points have a deep notch in the center of the base, giving them a forked or split look. This unique shape makes them different from other types like stemmed or notched points.
The deep notch often creates a shape that looks like “ears” dividing into two branches. Flaking around the base and center helps give these points their distinct appearance.
Some bifurcated points are ground or smoothed to make their shape more refined. Many of them have shoulders like stemmed points, but some do not have clearly defined shoulders.
The Types of Stone Commonly Used
When you’re out searching it’s important to know what colors and textures you should be looking for. These are the most common to keep an eye out for:

Flint (Chert)
Flint is a hard, fine-grained rock that often comes in colors like gray, black, brown, or tan. It has a smooth surface and sometimes a glossy appearance when freshly broken. Inside, it has a glassy or waxy texture, which makes it perfect for shaping into sharp tools.
Flint was used because it is very hard but can also be chipped or flaked into sharp edges. Flint was also durable and could hold a sharp edge for a long time, making it ideal for hunting and cutting.

Obsidian
Obsidian is a type of volcanic glass that forms when lava cools very quickly without forming crystals. Its sharp edges made it perfect for making tools like arrowheads and cutting blades in the past.
This material is hard and brittle, breaking in a smooth and predictable way. These qualities let people shape it into sharp and strong projectile points using a method called knapping.
Indigenous groups traded obsidian because of its unique features and usefulness.
Jasper
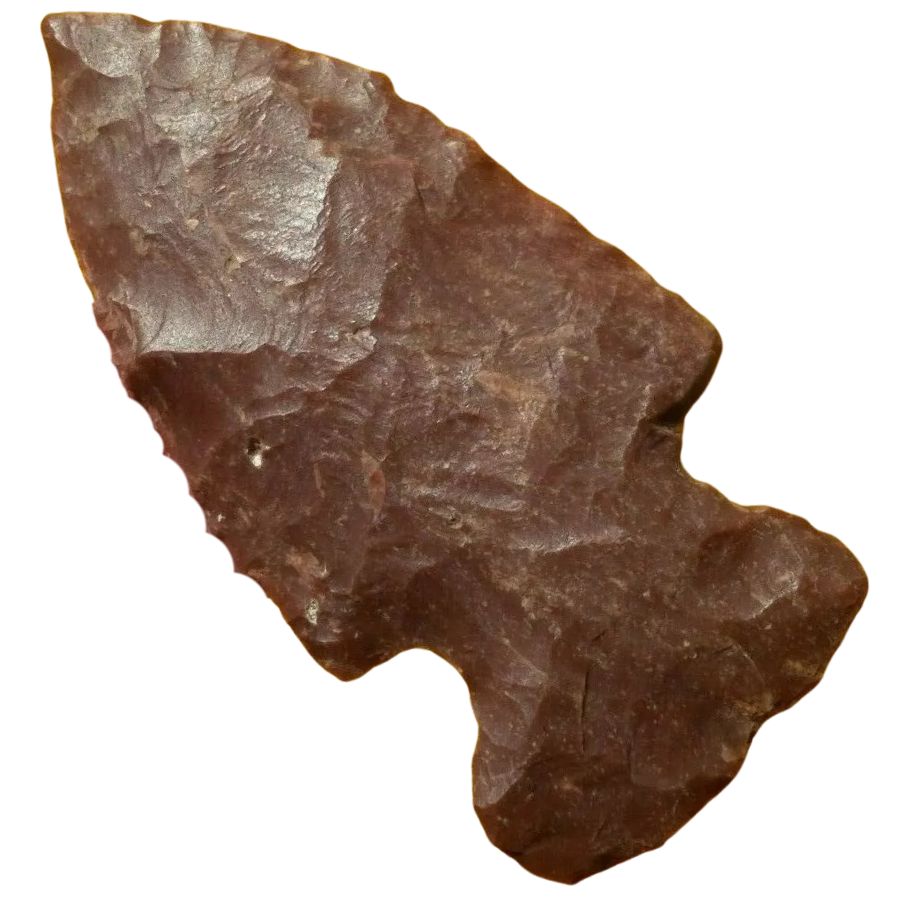
Jasper is a hard, opaque rock made mostly of quartz and chalcedony. Its colors, like red, yellow, brown, and green, come from the minerals it contains, with red often caused by iron.
This rock breaks smoothly, making it great for making sharp tools and projectile points. Its strength and smooth break made it useful for cutting, carving, and engraving.
People have used jasper for thousands of years, and it has been found in very old archaeological sites. It was shaped into tools and decorative items because it was both strong and versatile.

Quartzite
Quartzite is a tough rock formed when sandstone is heated and pressed together. It is mostly made of quartz and has a rough surface with a shiny look.
This rock breaks in a way that makes sharp edges, which is why it was used to make stone tools and arrowheads. People in the past often shaped quartzite into tools for cutting and grinding because it is so strong.
Quartzite can be white, gray, pink, or red, depending on the minerals inside it. Its durability and availability made it useful for making tools and for building.

Basalt
Basalt is a dark rock with fine grains that forms when lava cools quickly on the surface. Its hardness and strength were well-suited for crafting tools and weapons in the past.
This rock has a lot of magnesium and iron, which gives it the toughness needed for pounding and cutting tools like hammers and axes. Its durability also made it a good choice for sharp projectile points.
Basalt is tough enough to handle wear and tear, so it was shaped into reliable tools. Because it was easy to find, it became a popular material for early toolmakers.
The Types Of Arrowheads And Points You Can Find In The US
There are quite a few different types of arrowheads and other projectile points ready to be discovered. Keep an eye out for:

Clovis Points
Clovis points are some of the most iconic and widely recognized types of projectile points in North America. These stone tools, primarily used as tips for spears, are associated with early human populations in the Americas.
What makes Clovis points particularly unique is their distinct shape and craftsmanship. They are often considered the hallmark of the Clovis culture, which is thought to have been one of the first groups to inhabit the Americas.
What they look like
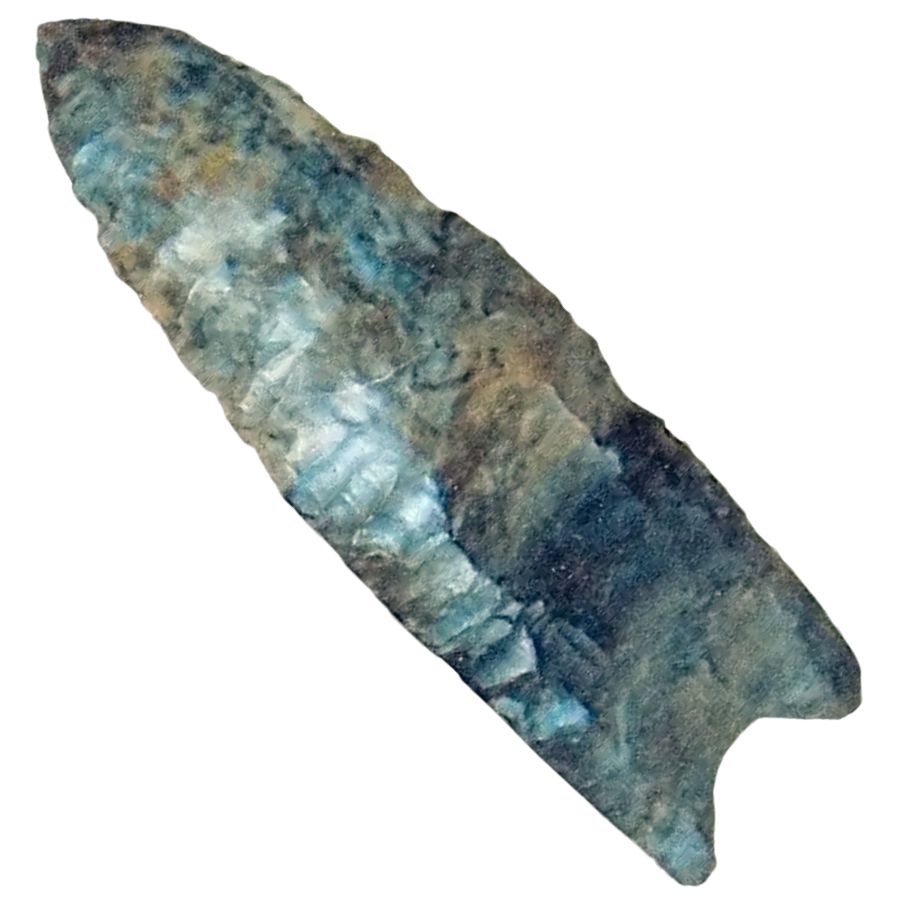
Clovis points are characterized by their large, leaf-shaped design with sharp edges and a prominent fluted base. They are typically made from high-quality materials like flint, chert, or obsidian, which allowed for the creation of extremely sharp edges.
The fluted base was likely a practical feature that allowed these points to be securely attached to a spear or dart shaft. The size of the points can vary, but they are generally between 2 and 4 inches in length.
The fluting, or groove, on the base sets them apart from other types of points found across North America and is one of the most recognizable features.
Time period
Clovis points were used around 13,000 years ago, during the late Pleistocene epoch, and are associated with the earliest human populations in the Americas.

Folsom Points
Folsom points are projectile points connected to the Folsom tradition in North America. They were first found in 1908 at the Folsom site in New Mexico, alongside the bones of an extinct bison, Bison antiquus.
This find showed that humans had lived in the Americas far earlier than was previously thought. The unique design of Folsom points was officially recognized in 1928 after another discovery confirmed their distinctive features.
What They Look Like
Folsom points are carefully worked on both sides and shaped like a symmetrical leaf with a concave base. They have wide, shallow grooves, called flutes, running nearly the full length, which may have helped attach them to wooden shafts.
Their edges are finely crafted, showing skilled workmanship. Some were also used as knives, in addition to being projectile points.
Making the flutes required advanced techniques, and archaeologists spent years figuring out how they were made. The fluting process started at the base using a nipple platform, and traces of this platform can still be seen on some points.
Time Period
Folsom points were used between 11,000 BCE and 10,000 BCE, during a period when people hunted large animals like bison. Their discovery changed earlier ideas about when humans first lived in North America.
Dalton Points
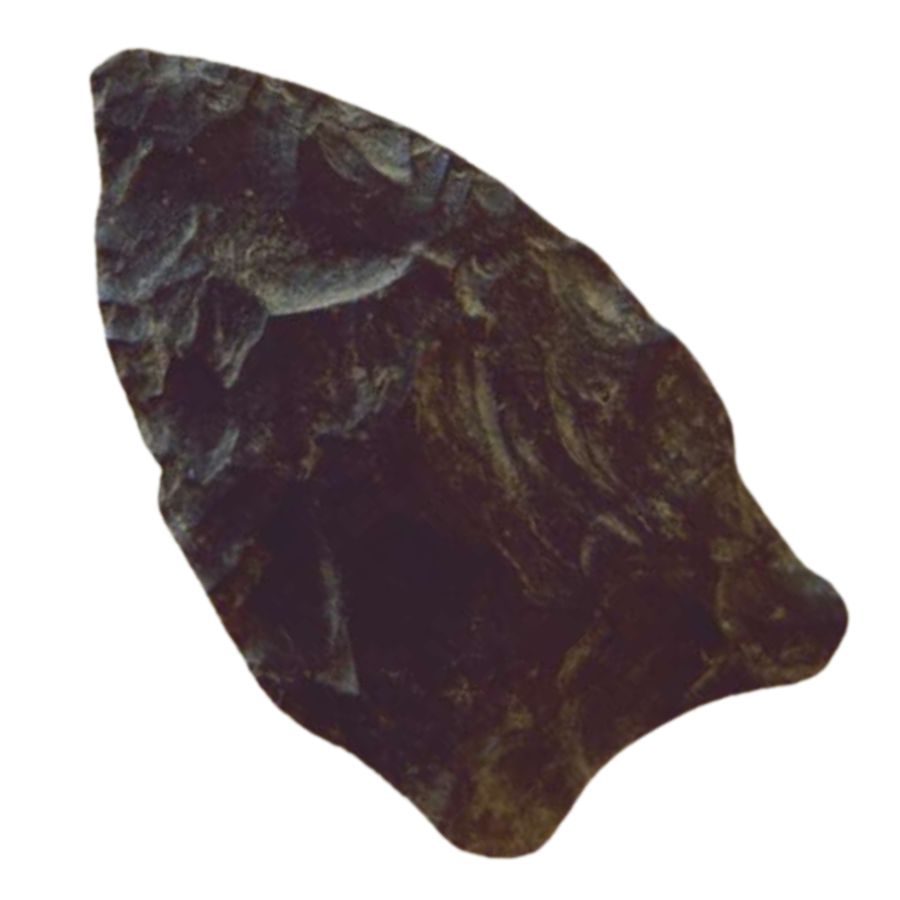
Dalton Points come from the Late Paleo-Indian and Early Archaic periods and were mainly found in southeastern North America. These tools were highly adaptable, serving as knives, saws, chisels, and scrapers as they were reshaped through frequent sharpening.
Their design combined practicality and flexibility, changing to fit different uses over time. Variants like the Hardaway Point and Meserve Point share features with Dalton Points but reflect regional or functional differences.
What They Look Like
Dalton Points are medium to large with a concave base and flared “ears.” The blade often has a narrowed waist that gives it a unique shape and is commonly serrated without beveling.
The cross-section of these points ranges from elliptical to flat. The hafting area is usually ground, and basal flaking can sometimes look like fluting.
Flaking patterns include oblique transverse, horizontal transverse, collateral, or random styles. Each technique shows the precision and effort required to craft these tools.
Time Period
Dalton Points were used between 10,700 BCE and 8,400 BCE, during a shift from Paleo to Archaic tool traditions.

Kirk Points
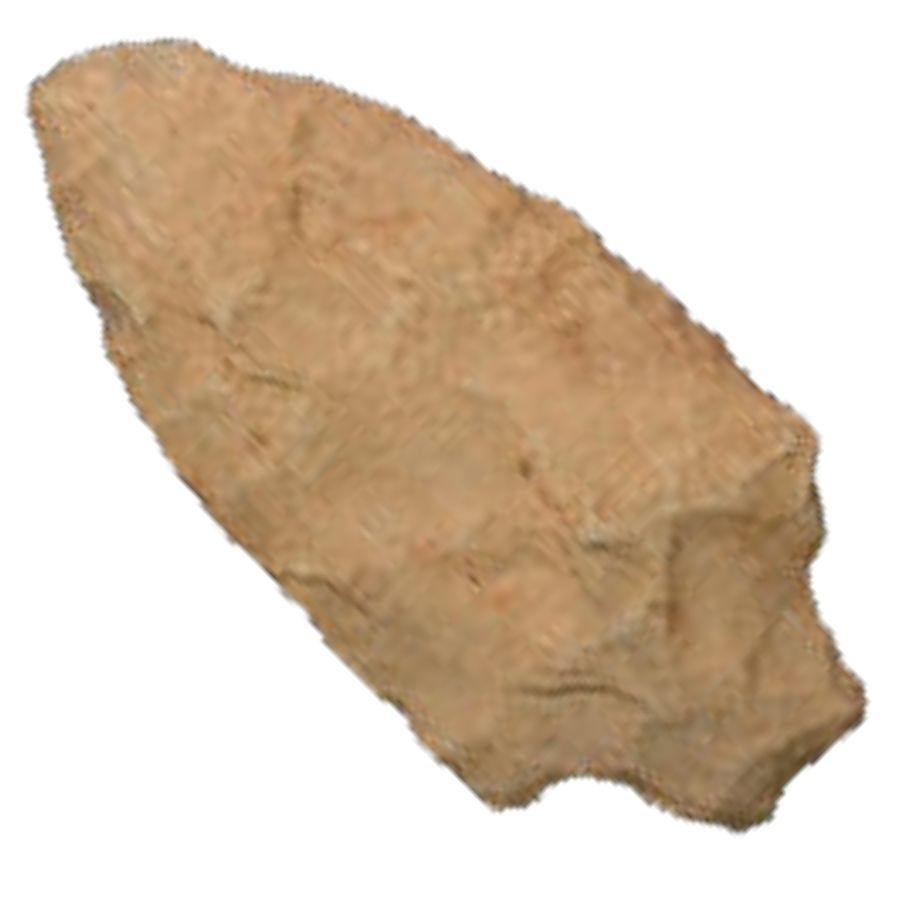
Kirk Points are arrowheads from the Early Archaic period, found mainly along the Eastern Seaboard, Gulf Coast, and in river valleys of the United States. They were adaptable tools with different styles, including the Kirk Corner Notched and Kirk Stemmed types.
These points were often reshaped for new purposes, making them useful in many ways. The Kirk design likely influenced other point types as tool-making methods evolved.
What They Look Like
Kirk Corner Notched Points are medium to large, with a triangular shape and a cross-section that ranges from flat to slightly rounded. They have strongly barbed shoulders and expanding stems, with bases that can be straight or concave.
The blades are often serrated, with the depth of serrations varying between points. These points have a random flaking pattern, and basal grinding is not commonly seen.
Kirk Stemmed Points feature straight or slightly expanding stems and blades that are usually straight or slightly curved. Serrations are less frequent, and the shoulders are slightly barbed or horizontal.
Time Period
Kirk Points date back to 9,500 to 8,500 years ago, during the Early Archaic period and the early Holocene.
Savannah River Points
Savannah River Points are arrowheads from the Late Archaic period, mainly found in the southeastern United States. They are large, triangular tools with square stems, made with percussion flaking and finished with pressure flaking.
These points are relatively thin for their size, measuring between 44 and 170 mm long and 35 to 70 mm wide. Variants like the Small Savannah River and Cattle Run types reflect differences in region and time.
What They Look Like
Savannah River Points have broad, triangular blades with edges that are either straight or slightly curved. The lower half of the blade often has parallel sides that curve toward the tip.
The stem is square with sides that are straight or slightly expanding, and the base is typically concave. Basal thinning is common, but basal grinding is rare on these points.
The cross-section is either flat or slightly rounded, and the flaking pattern is random. These points are relatively thin, with a thickness-to-width ratio of about 1:10.
Time Period
Savannah River Points date back to roughly 4,150 to 3,800 years ago, during the Late Archaic period.

Adena Points
Adena Points are medium to large arrowheads tied to the Adena culture, which was centered along the Ohio River. These tools were often made from chert and crafted with flaking techniques that ensured durability and sharp edges.
Found across the Ohio Valley and other parts of eastern North America, they are most common in Ohio, Kentucky, Indiana, and West Virginia. Their design came from earlier Archaic tools and was used for cutting, piercing, and other tasks.
What They Look Like
Adena Points have broad, triangular or oval-shaped blades with edges that curve outward. Repeated sharpening often made the blades straighter over time.
The stems are medium to long and can be square or rounded, earning the nickname “beaver tail.” Bases may sometimes be ground, and the cross-section is typically biconvex, providing a balanced shape.
These points range from 34 to 150 mm in length, with an average size of 70 mm. They are relatively thin, with widths averaging 28 mm and thicknesses between 7 and 17 mm.
Time Period
Adena Points date from 800 BCE to 200 CE, during the Early Woodland period when the Adena culture flourished.
Woodland Triangular Points
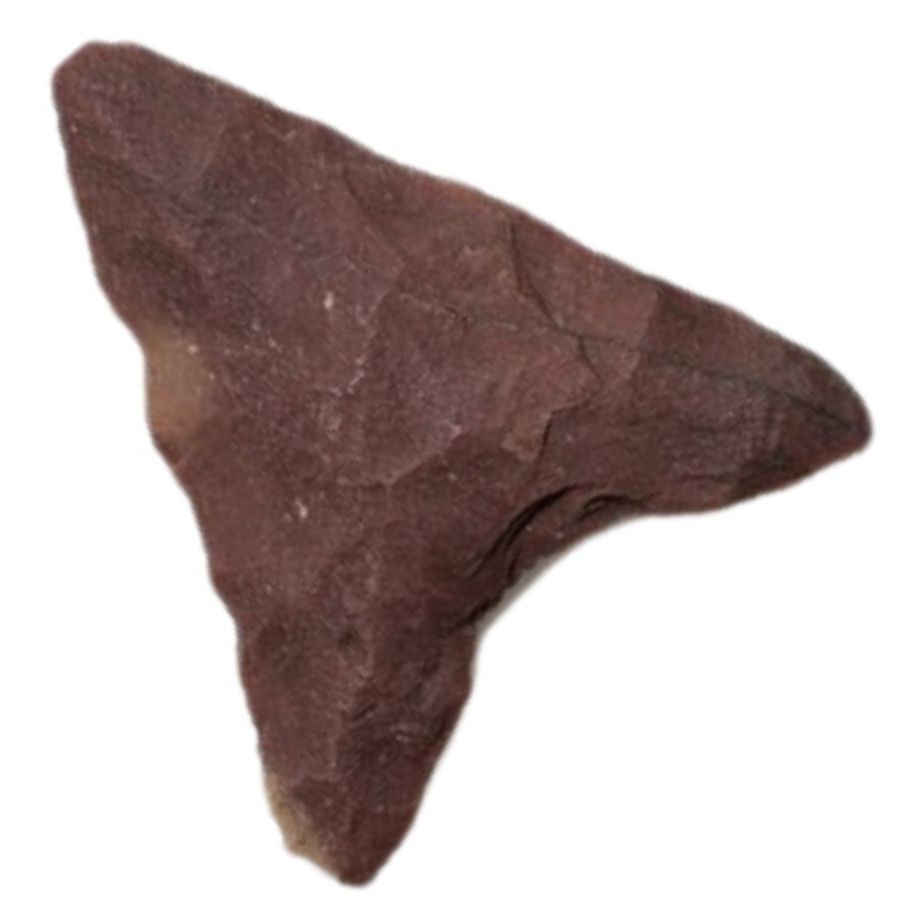
Woodland Triangular Points are arrowheads from the Woodland Period in North America, used between 1100 BCE and 1650 CE. They were made from materials like quartzite, quartz, rhyolite, chert, and jasper, using resources available locally.
These points were practical tools for hunting and other tasks and have been found in various locations. Their design changed over time to adapt to technological and societal developments.
What They Look Like
Woodland Triangular Points have a simple triangular shape with defined edges and a symmetrical appearance. The choice of durable materials added to their reliability.
The edges are generally straight, and the design is both functional and efficient. Careful flaking was often used to improve their shape and performance.
The size and thickness of these points vary based on their intended use and material. Their straightforward design made them adaptable and effective for different purposes.
Time Period
Woodland Triangular Points were used during the Woodland Period, from approximately 1100 BCE to 1650 CE.

Mississippian Points (Madison Points)
Madison Points are small triangular arrowheads used during the Late Woodland to Mississippian period. They were first identified in Madison County, Illinois, and are found throughout the eastern United States.
Made using pressure flaking, Madison Points are thin and sharp, designed for efficient use. They replaced Levanna Points and marked a change in arrowhead design during this era.
What They Look Like
Madison Points are small, typically ranging from 12 mm to 72 mm in length, with most around 26 mm. Their shape is either isosceles or equilateral triangles, with blade edges that are usually straight but can also curve outward or inward.
The base is straight or slightly concave, with basal thinning to help attach the point to shafts. Serration is rare, and the quality of craftsmanship varies from highly refined to more basic designs.
The cross-section of these points is flat, and the flaking pattern is random. Their small size and simple design made them reliable tools for hunting.
Time Period
Madison Points were used from about 1100 BP to 300 BP, during the shift from the Late Woodland to the Mississippian period.

Pine Tree Points
Pine Tree Points are medium to large arrowheads from the Early and Middle Archaic periods. They were named after the Pine Tree site in Limestone County, Alabama, and are found across the southeastern United States and parts of the Ohio Valley.
These points were built for practical use, with serrated edges and a central ridge that improved sharpness and balance. They may have evolved from the Greenbrier type and were sometimes reclassified when reshaped into narrower forms.
What They Look Like
Pine Tree Points have triangular blades with side notches and serrated edges. A ridge down the center, created by parallel or chevron flaking, gives the blade structure and balance.
The stems are short with incurving sides and a base that can be straight, concave, or convex. Basal grinding is common, making them easier to secure to shafts.
These points typically measure 50 mm to 66 mm long, 25 mm to 29 mm wide, and 5 mm to 9 mm thick. Their size and shape make them both durable and effective.
Time Period
Pine Tree Points were used between 8,000 BP and 5,000 BP during the Early and Middle Archaic periods.

Guilford Points
Guilford Points are medium to large arrowheads from the Middle Archaic period. They are named for their connection to the Guilford area in North Carolina and are often found in the Piedmont region and nearby locations.
These points feature long, narrow blades and well-shaped bases. They were designed for both strength and practicality, with flaking techniques that reflect skilled craftsmanship.
What They Look Like
Guilford Points have long, narrow blades with smooth or slightly curved edges. Their thickness and symmetrical shape make them easy to identify.
The base is typically concave or rounded, with straight bases appearing less frequently. Ground basal edges help with secure hafting.
Lengths range from 50 to 120 mm, with an average of about 90 mm. Widths are usually between 20 and 35 mm, and thickness varies from 5 to 12 mm.
Time Period
Guilford Points were made and used between 6,200 BP and 5,000 BP, near the end of the Middle Archaic period.
Always Confirm Access and Collection Rules!
Before heading out to any of the locations on our list you need to confirm access requirements and collection rules for both public and private locations directly with the location. We haven’t personally verified every location and the access requirements and collection rules often change without notice.
Many of the locations we mention will not allow collecting but are still great places for those who love to find incredible arrowheads and points in the wild without keeping them. We also can’t guarantee you will find anything in these locations since they are constantly changing.
Always get updated information directly from the source ahead of time to ensure responsible collecting. If you want even more current options it’s always a good idea to contact local rock and mineral clubs and groups
Formation To Look Out For If You Want The Best Results
When you’re out looking in the specific locations further down in the article you should pay special attention to a few different types of areas and formations. They are where you’re going to have your best luck.
But before we dive into specifically where to look you need to make sure you understand the type of rocks and minerals you’re seeing.
If you want REAL results finding incredible rocks and minerals you need one of these 👇👇👇
Finding the coolest rocks in isn’t luck, it's knowing what to look for. Thousands of your fellow rock hunters are already carrying Rock Chasing field guides. Maybe it's time you joined the community.
Lightweight, mud-proof, and packed with clear photos, it’s become the go-to tool for anyone interested discovering what’s hidden under our red dirt and what they've already found.
Join them, and make your next rockhounding trip actually pay off.
What makes it different:
- 📍 Find and identify 140 incredible crystals, rocks, gemstones, minerals, and geodes across the USA
- 🚙 Field-tested across America's rivers, ranchlands, mountains, and roadcuts
- 📘 Heavy duty laminated pages resist dust, sweat, and water
- 🧠 Zero fluff — just clear visuals and straight-to-the-point info
- ⭐ Rated 4.8★ by real collectors who actually use it in the field

Creeks, especially where two meet
Creeks are great places to look for arrowheads, especially where two streams come together. These spots were often used as crossings or gathering areas, making it more likely to find artifacts.
Check gravel bars and shallow edges where the water slows, as arrowheads can get trapped there. Silt and debris might hide them, so it’s important to inspect carefully and gently.
Pay attention to sediment layers at the junction of creeks, where erosion can uncover hidden arrowheads. Watch for sharp edges or symmetrical shapes that stand out from the surrounding rocks, as these could be signs of an artifact.

Riverbeds
Riverbeds can contain arrowheads that were moved and dropped by flowing water. Look in places where the current slows, like bends, gravel bars, and shallow pools, as these often collect heavier objects.
Check exposed gravel and rocks carefully for sharp edges or symmetrical shapes that don’t match natural stones. The edges of the riverbed and sandbanks are good spots to search, especially after rain, when water can uncover hidden items.
Watch for materials that look different from the usual stones in the riverbed. Erosion and water movement may group arrowheads with similar-sized rocks or reveal them in visible layers.

Logging clear cuts
Logging clear cuts can uncover arrowheads by disturbing the soil and exposing hidden ground. Search along ridges and slopes, where water runoff might have moved artifacts to easier-to-reach spots.
Flat areas in the clear cut are good places to check, as they were often used for human activity. Look closely at soil piles left by logging equipment, as these can bring buried arrowheads to the surface.
The edges of logging roads and skid trails are worth searching, as they often cut through topsoil that could hold artifacts. Areas with compact or clay-heavy soil are better for preserving arrowheads than sandy or loose ground.

Plowed fields
Plowed fields are great places to look for arrowheads, especially after rain. The water clears away loose dirt, making artifacts easier to spot on the surface.
Check areas where the soil looks darker or richer, as these might have been used for human activity. Look closely along furrows, as plowing often brings buried artifacts to the surface.
Focus on higher spots or small hills in the field, which were common choices for campsites or settlements. Watch for sharp edges or symmetrical shapes in the soil that stand out from the surrounding dirt.

Construction sites
Construction sites can uncover layers of soil that have been undisturbed for years, making them good places to search for arrowheads. Freshly dug or graded areas are especially worth checking for artifacts.
Check piles of removed dirt, as they often bring buried objects to the surface. Look at the edges of trenches and ditches, where erosion might reveal arrowheads in the soil.
Search near water sources or elevated spots within the site, as these were common choices for early campsites. Watch for sharp edges or symmetrical shapes that stand out from the surrounding dirt and debris.

Mountain washouts
Mountain washouts can carry debris, including arrowheads, along natural drainage paths. Check areas where the water slows, as heavier objects like arrowheads often settle there.
Look at gravel bars and rock clusters in the washout, as they can trap artifacts. Freshly exposed soil and sediment after heavy rain are good spots to search for buried arrowheads.
Focus on bends and natural barriers in the washout, where water flow creates small eddies. Watch for shapes and edges that stand out from the surrounding stones, as these may indicate worked tools.

Mesas and bluffs
Mesas and bluffs are good places to look for arrowheads because of their flat and elevated land. Check the edges and overlooks, as these were often used as lookout points.
Search the base of the bluff where erosion can uncover buried artifacts. Rock outcroppings or natural shelves may also hold arrowheads and other tools.
Look for spots where trails or paths might have crossed the mesa. Small depressions or clearings are great places to check for signs of past activity.
Specific locations in the state to look
Now that you have a few ideas on more general locations here are 5 specific recommendations to start with. After these we will have a larger list organized by region of the state:
Red River Banks
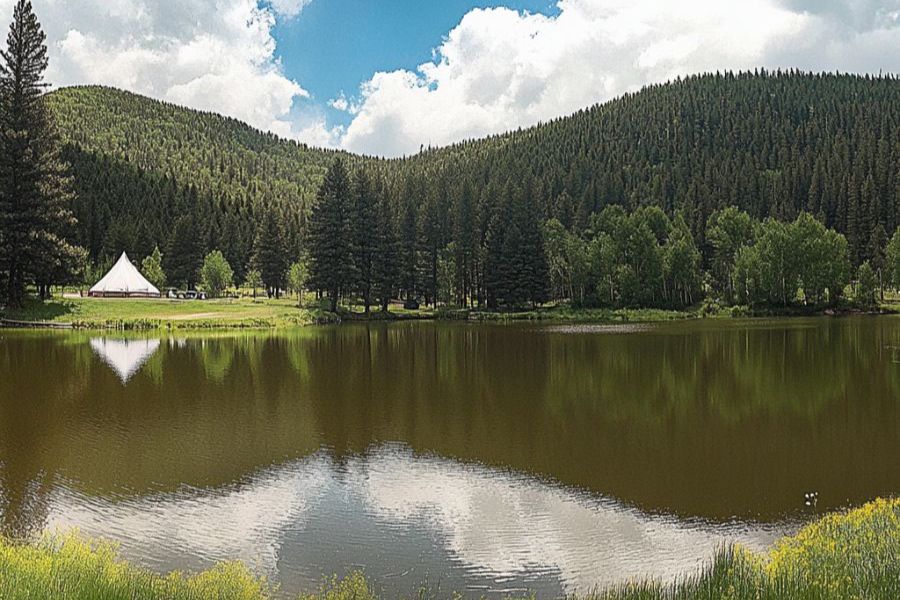
The Red River Banks in Louisiana has exposed countless Native American artifacts over centuries of natural erosion. The river’s constant movement reveals layers of ancient campsites and hunting grounds, particularly after heavy rains or flooding.
The best spots to find arrowheads are usually found near high bluffs where the river bends, as these areas were preferred camping locations. Look for gravel bars and sandy areas where the current has sorted and deposited lighter materials.
Expert collectors recommend searching after the river has dropped following a flood, as new artifacts often wash out of the banks. The distinctive reddish-orange clay along the banks makes white or gray points stand out clearly.
Notable finds have included Clovis points dating back 13,000 years, along with pottery shards and tools from more recent Caddo settlements.
Lake Pontchartrain

Lake Pontchartrain in Louisiana is a large, shallow body of water that connects to the Gulf of Mexico through several smaller waterways. It stretches about 40 miles across and has brackish water, meaning it’s a mix of saltwater and freshwater.
The land around the lake includes marshes, swamps, and sandy shores, which provide homes for many animals, including alligators and herons. Fishing and boating are popular activities, with people catching fish like red drum and speckled trout.
The Lake Pontchartrain Causeway, one of the longest bridges in the world, stretches across its surface, making travel easier between New Orleans and the Northshore.
Native American tribes lived near the lake for thousands of years, and arrowheads can still be found along some of the rivers and bayous that flow into it. Even though hurricanes have caused damage in the past, the lake remains an important part of Louisiana’s history and culture.
Sabine River Area
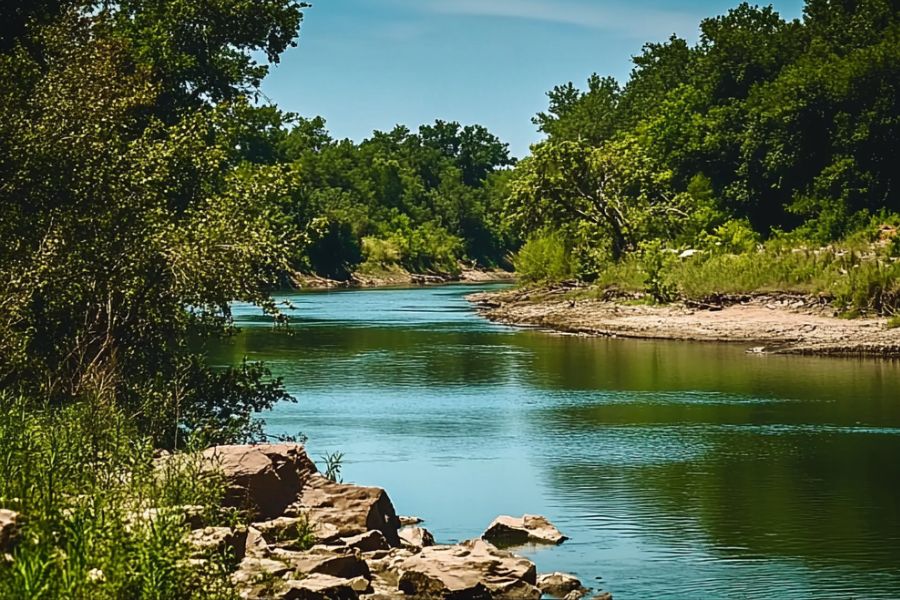
The Sabine River area in Louisiana is a rich location for finding arrowheads and points. This region has a deep history, once inhabited by Native American tribes like the Caddo and Atakapa.
The riverbanks and nearby fields are especially good spots to discover stone tools, spear points, and arrowheads. The Sabine River’s fertile lands and water supply made it an ideal location for settlement, hunting, and gathering.
Artifacts found here often include flint or chert points, which were used for hunting deer and other game. Some of these tools date back thousands of years, reflecting the skills and craftsmanship of early peoples.
Exploring the Sabine River area provides a glimpse into the past, showcasing the connection between the land and the people who thrived there long before modern times.
Ouachita River Valley
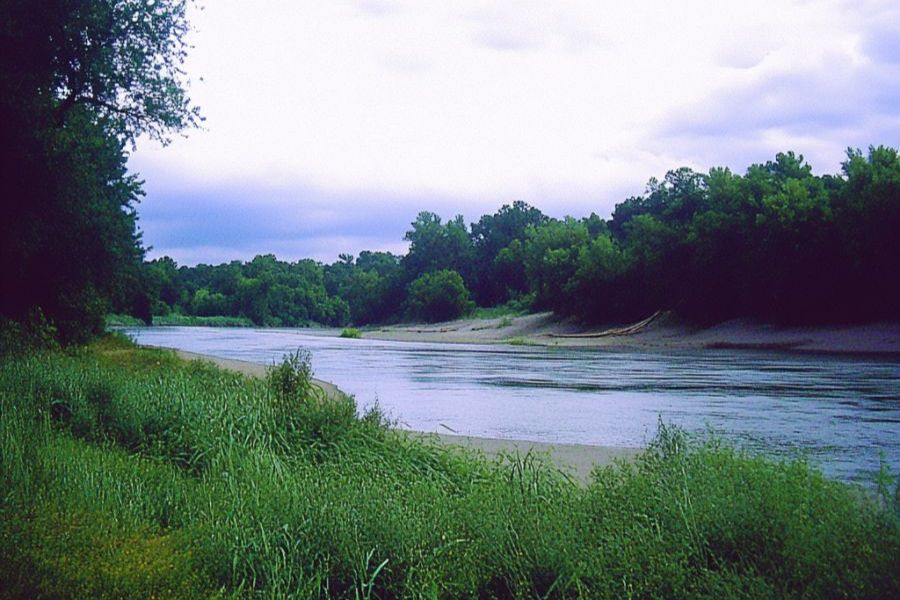
The Ouachita River Valley contains countless prehistoric sites where Native Americans left behind stone tools and pottery. The Caddo Indians established large settlements here between 800-1600 AD, creating numerous village sites along the river’s natural levees and terraces.
This fertile valley also attracted earlier Archaic period hunters who left behind distinctive spear points and tools. Areas near Monroe and Columbia have yielded many Dalton and San Patrice points dating back 10,000 years.
The Poverty Point culture also influenced this region around 1700-1100 BC, evidenced by their distinctive artifacts and clay cooking balls found in the valley. Later, tribes like the Tunica and Koroa established villages here during the 1600s-1700s.
The river’s periodic flooding helped preserve artifacts by burying them in layers of silt. After heavy rains expose these ancient sites, collectors often find points, pottery shards, and tools in freshly eroded banks and sandbars.
Caddo Lake
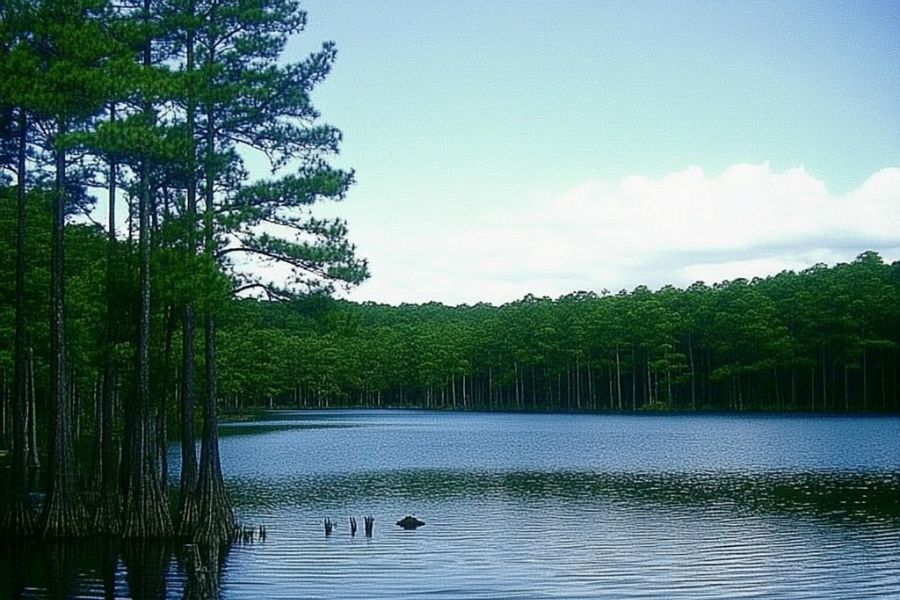
Caddo Lake’s marshy shores and ancient Native American settlements make it a prime spot for finding arrowheads. The lake’s constantly changing water levels expose new artifacts along its banks.
The Caddo Indians, who gave the lake its name, lived here for over 1,000 years. Their sophisticated culture left behind numerous tools, points, and ceremonial items. The Atakapa and Karankawa tribes also frequented these waters, contributing to the rich archaeological history.
Experienced collectors focus on eroded shorelines and areas where creeks feed into the lake, particularly near Big Cypress Bayou. The lake’s dark, tannin-stained waters often preserved artifacts that would have deteriorated elsewhere.
Look for high ground near water sources – these elevated areas were preferred camping spots. The red clay soil around Caddo Lake helps preserve stone tools better than many other locations in Louisiana.
More great places to find arrowheads and points
Here is the full list of great places to search:
| Region | Location | Description |
|---|---|---|
| Northern | Bayou Pierre | Known for its mound sites, Bayou Pierre contains artifacts from prehistoric communities, including arrowheads and pottery fragments. |
| Black Lake | Shorelines and eroded areas have produced various projectile points from prehistoric periods. | |
| Caddo Lake | A significant area for Caddoan artifacts, including finely crafted arrowheads. | |
| Little River | Artifacts such as small arrowheads and stone tools are often found along its banks. | |
| Ouachita River Valley | A hotspot for prehistoric artifacts like arrowheads and spear points due to extensive ancient habitation. | |
| Red River Area | The riverbanks occasionally reveal arrowheads and projectile points from Native American settlements. | |
| Central | Alexandria Area | A transitional area for ancient cultures, yielding arrowheads of various styles and sizes. |
| Bayou Cocodrie | This area has uncovered artifacts from multiple prehistoric periods. | |
| Sabine River Area | A significant area for ancient arrowheads and stone tools, often found along the riverbanks. | |
| Southern | Bayou Lafourche | Known for Native American artifacts like projectile points and pottery fragments. |
| Calcasieu River | Artifacts such as arrowheads and stone tools are sometimes discovered near its banks. | |
| Grand Isle | Occasionally produces arrowheads and tools washed up from ancient coastal settlements. | |
| Lake Pontchartrain | Historic artifacts, including arrowheads, have been found near the shoreline. | |
| Marsh Island | Coastal erosion has revealed Native American arrowheads and tools in this area. | |
| Eastern | Baton Rouge Area | Arrowheads and tools from early settlements have been found near the Mississippi River banks. |
| Pearl River Area | Known for prehistoric projectile points, this area was home to early Native American tribes. | |
| Tensas River | Artifacts such as arrowheads and stone tools are often discovered in the alluvial soils. | |
| Western | Anacoco Lake | A popular spot for finding small arrowheads and other artifacts along its shores. |
| Sabine River Area | This region holds a wealth of artifacts from ancient Native American settlements, including arrowheads. | |
| Vernon Lake | The shores and surrounding forests have yielded arrowheads and other stone tools. |
Always Confirm Access and Collection Rules!
Before heading out to any of the locations on our list you need to confirm access requirements and collection rules for both public and private locations directly with the location. We haven’t personally verified every location and the access requirements and collection rules often change without notice.
Many of the locations we mention will not allow collecting but are still great places for those who love to find incredible arrowheads and points in the wild without keeping them. We also can’t guarantee you will find anything in these locations since they are constantly changing.
Always get updated information directly from the source ahead of time to ensure responsible collecting. If you want even more current options it’s always a good idea to contact local rock and mineral clubs and groups

